Webchat is a website-based communication feature that allows site visitors to interact directly with users (agents) through a chat widget available on the website.
How Customers Can Send Messages #
Customers must send the first message to your business to start a conversation.
There are several ways to encourage customers to visit your website and initiate a chat:
Chat Link: Add a URL to emails, newsletters, or business cards that directs customers to your website to start a conversation with you.
QR Code: QR codes can be placed in physical locations such as hotels, restaurants, or malls. When customers scan the code, they will be directed to your website to start chatting with you.
Obrolan langsung: The live chat option allows your customers to receive assistance and responses in real time. However, to ensure you can follow up with customers even after the live chat ends, you need to collect their contact details during the conversation. There are three ways to do this:
Pre-Chat Form: Set up a form before the chat begins. This will prompt customers to enter their contact details before they can start chatting with you.
Supported File Types #
The following file types are supported by Webchat, along with their maximum file sizes:
Images (up to 20 MB)
Videos (up to 20 MB)
Files (up to 20 MB)
Widget Installation #
To install the widget, you can follow the steps below:
a. How to Install on WordPress #
You can quickly and easily add the widget to your WordPress website.
Prepare the installation #
To install the widget on WordPress, you will need the following:
Access to your WordPress website dashboard
The chat widget code for your website
Ensure your website domain is properly configured to support the installation
Install on WordPress #
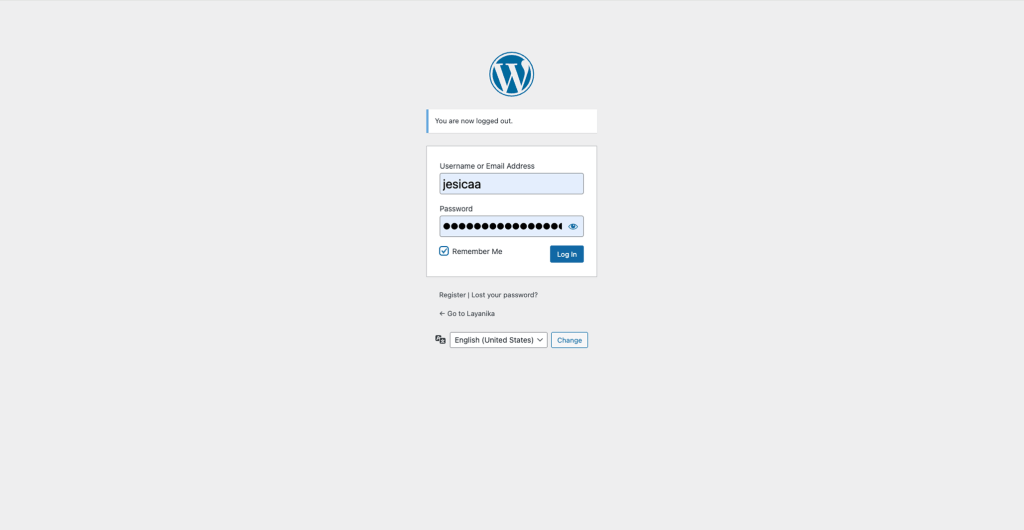
Step 1:
Log in to WordPress, and
navigate to your website’s admin dashboard.
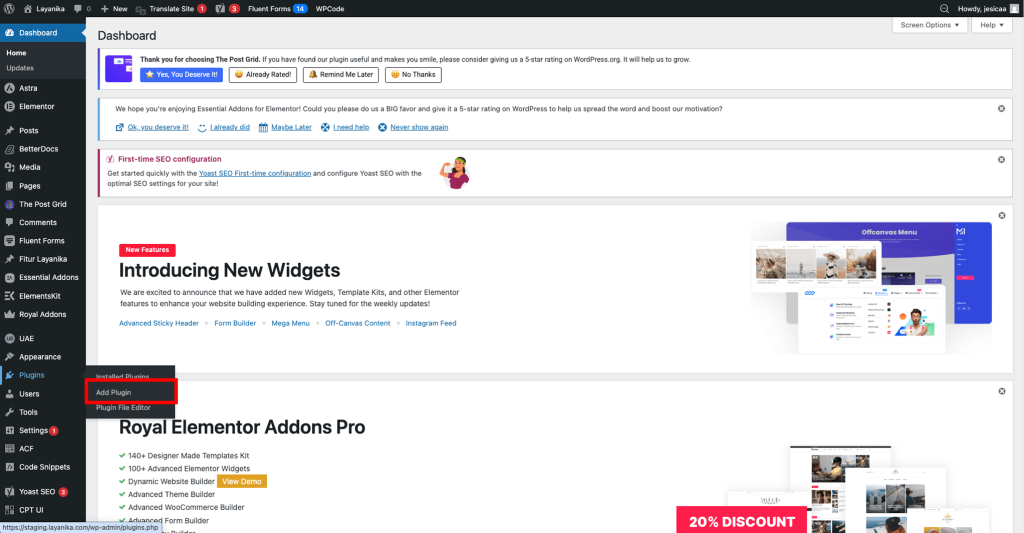
Step 2:
Go to the Plugins page.
From the left navigation panel, click Plugin, then click Add Plugin at the top of the page.
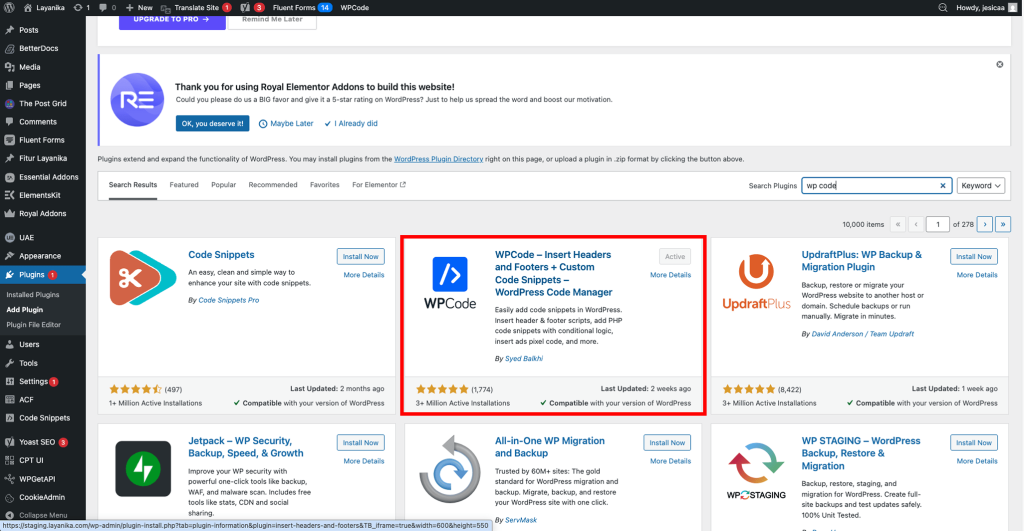
Step 3:
Add a new plugin.
Search plugin WPCode ,click Install Now and make sure to activate the plugin after installation.
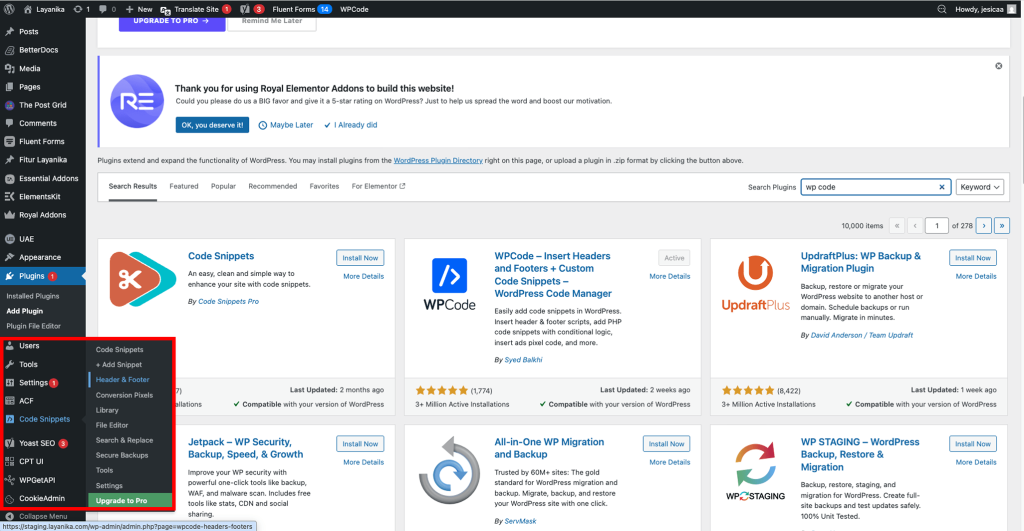
Step 4:
From the left navigation menu, click Code Snippets then select Header & Footer from the submenu.
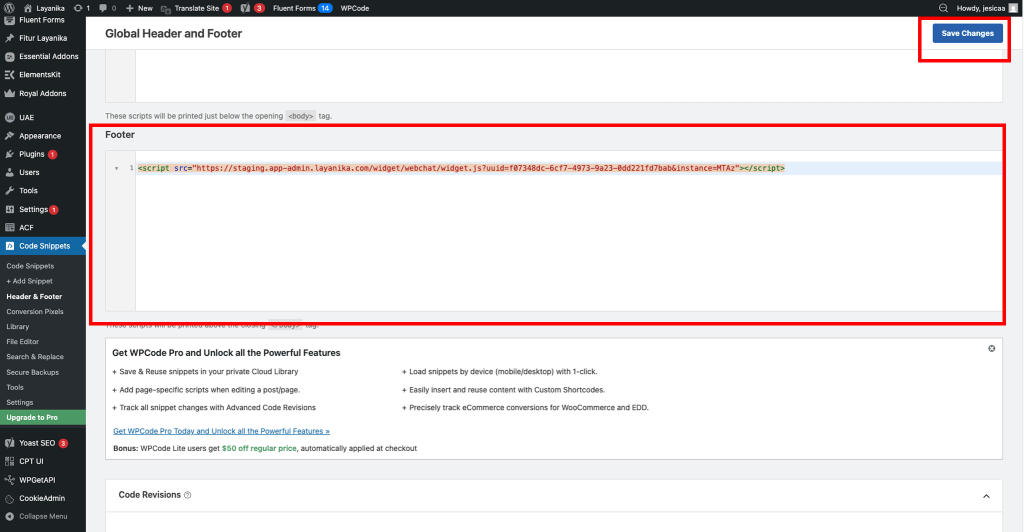
Step 5:
From the left navigation menu, click Footer Scripts section on the Header & Footer page. Then click Save.
b. Using Other Platforms #
For other platforms or services, navigate to the page’s HTML source. Paste the script just before the closing tag </body> .
<body>
...
...
...
<paste script here>
</body>
Connect the widget to the Webchat channel in Layanika #
Follow the steps below to connect the widget to the Webchat channel in Layanika:
Step 1:
Go to the Settingsmenu, then select Channel. Click add channelthen select webchat.
Step 2:
Enter the website where the widget will be added.
Make sure the website is written in the correct format, for example:
- https://layanika.com/
- layanika.com
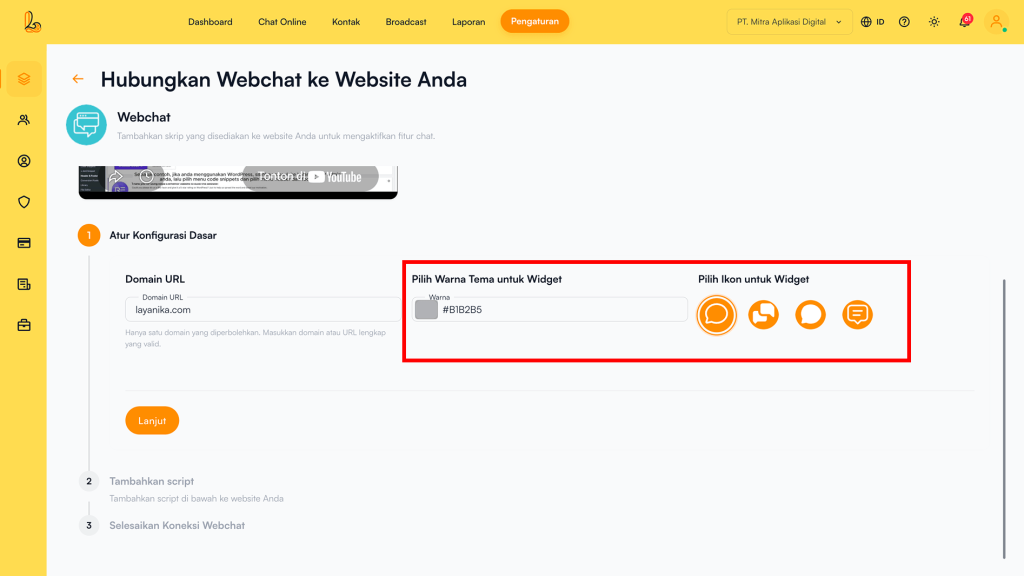
Step 3:
Select a theme color for your widget. Then choose the widget icon that will be displayed on your website. Click Continue.
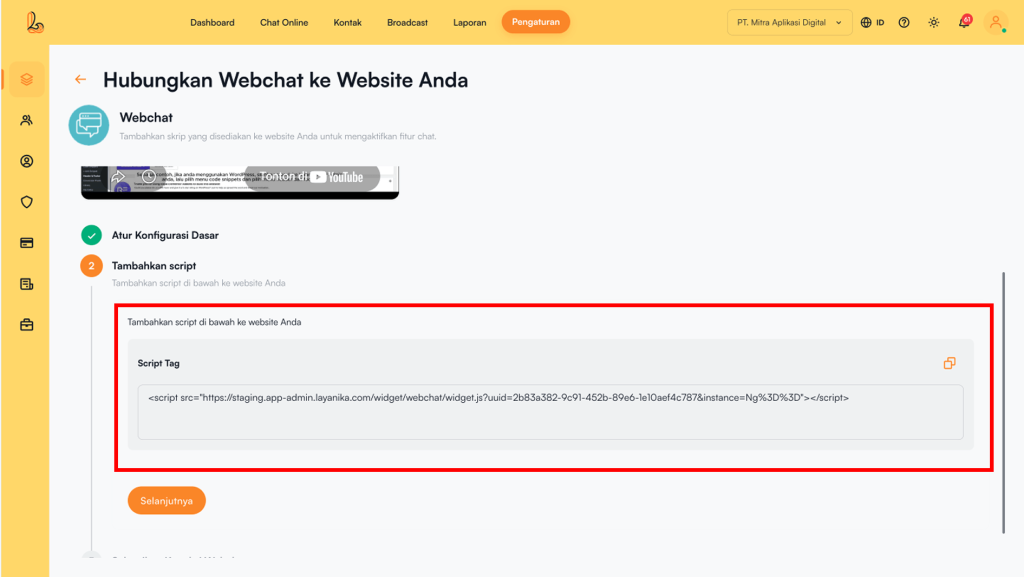
Step 4:
Add the script to your website settings. Then click Next.
Widget Customization #
Go to the Settingsmenu, then select Channel. Find your Webchat channel, click Manage then select Widget Customization.
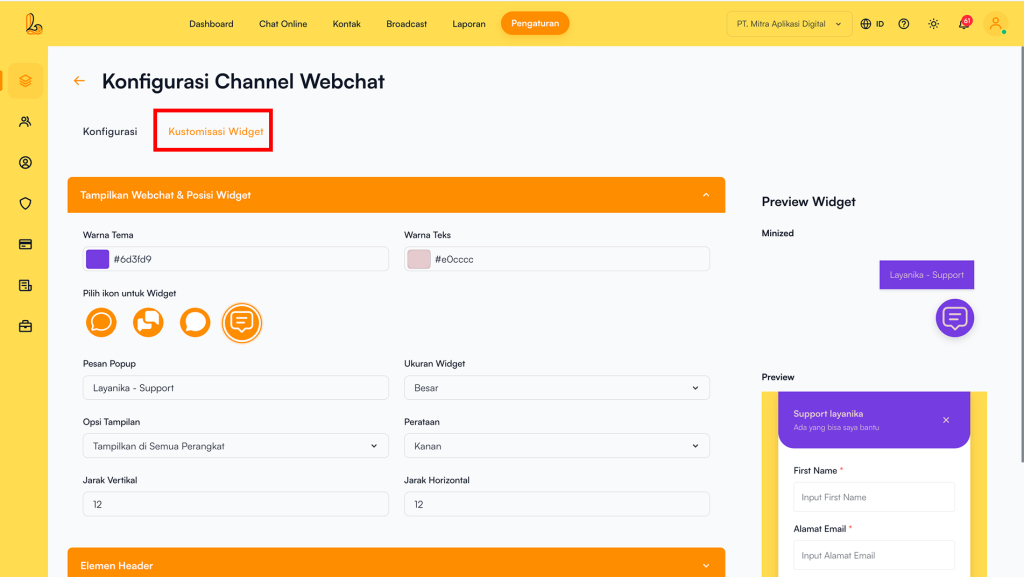
Display Webchat & Position Widget #
You can customize the following settings to change the appearance of the widget on your website.
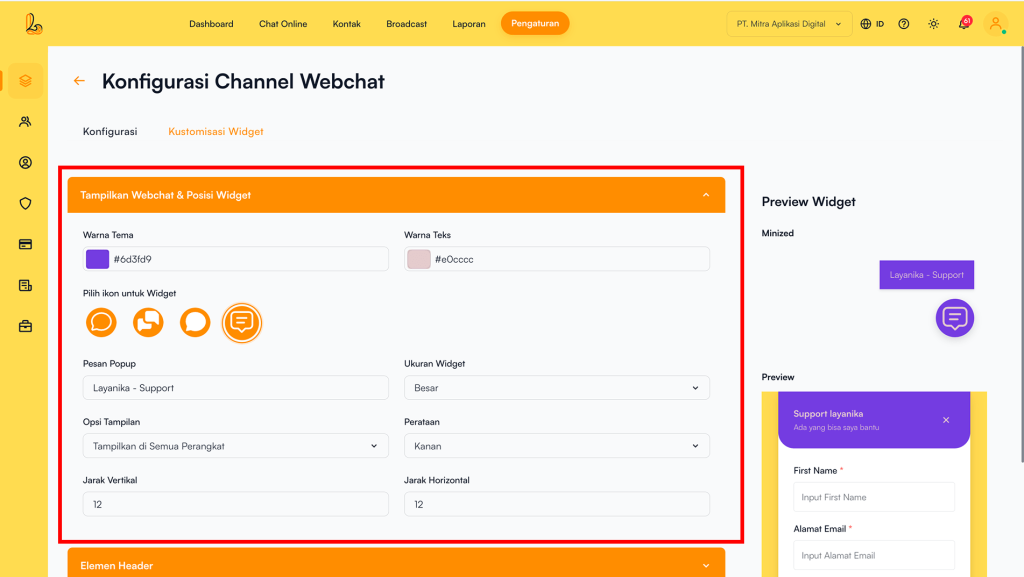
| Component | Description |
|---|---|
| Theme Color | Sets the primary color of the webchat widget |
| Text Color | Sets the text color within the widget |
| Ikon Widgets | Used to define the icon displayed on the webchat widget on your website. |
| Popup Message | The text displayed when the widget is in a minimized state |
| Widget Size | Adjusts the widget display size (Large / Standard / Small) |
| Display Option | Determines which devices the widget is shown on (All devices / Desktop only / Mobile only) |
| Alignment | Sets the widget position on the screen (Right / Left) |
| Vertical Spacing | The distance of the widget from the bottom of the screen |
| Horizontal Spacing | The distance of the widget from the side of the screen |
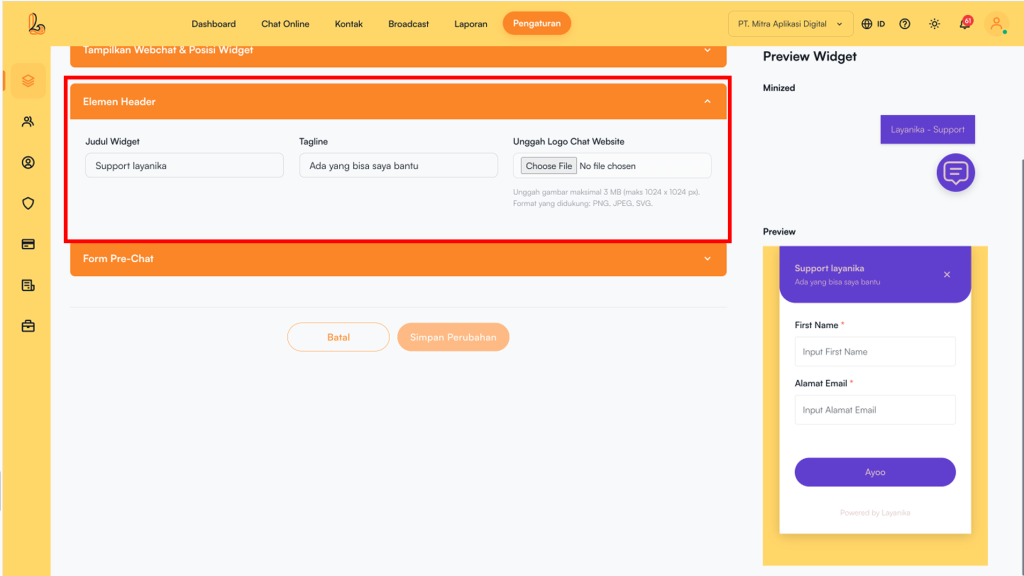
Header Elements #
| Component | Description |
|---|---|
| Widget Title | The title displayed at the top of your chat widget |
| Tagline | The tagline displayed below the title |
| Upload Website Chat Logo | Upload your logo to be displayed at the top of the webchat. Maximum image size is 3 MB (1024 × 1024 px). Supported formats: PNG, JPEG, SVG |
Pre-Chat Form #
Enabling this option will add a pre-chat form to your website chat. When activated, website visitors will be prompted to fill in the form before starting a conversation.
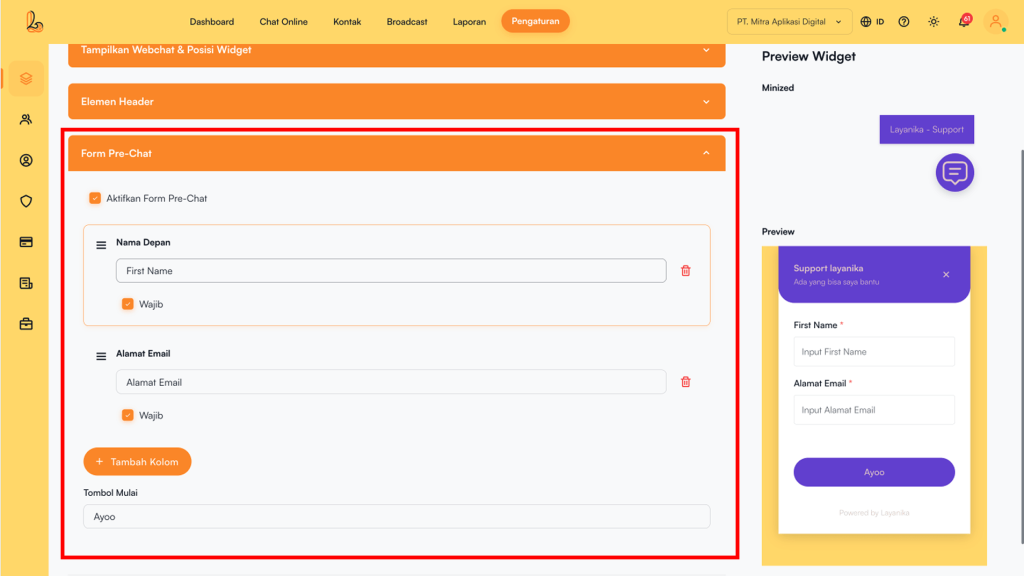
Available fields include:
- First Name
- Last Name
- Phone Number
- Email Address
Each field can be configured based on your needs:
- Required (Mandatory): You can set whether a field must be filled in by customers before starting a chat.
- Reorder Fields: Fields can be rearranged to adjust the display order based on your preference.
- Remove Fields: Unnecessary fields can be removed from the form.
Additionally, you can add new fields as needed using the Add Field.
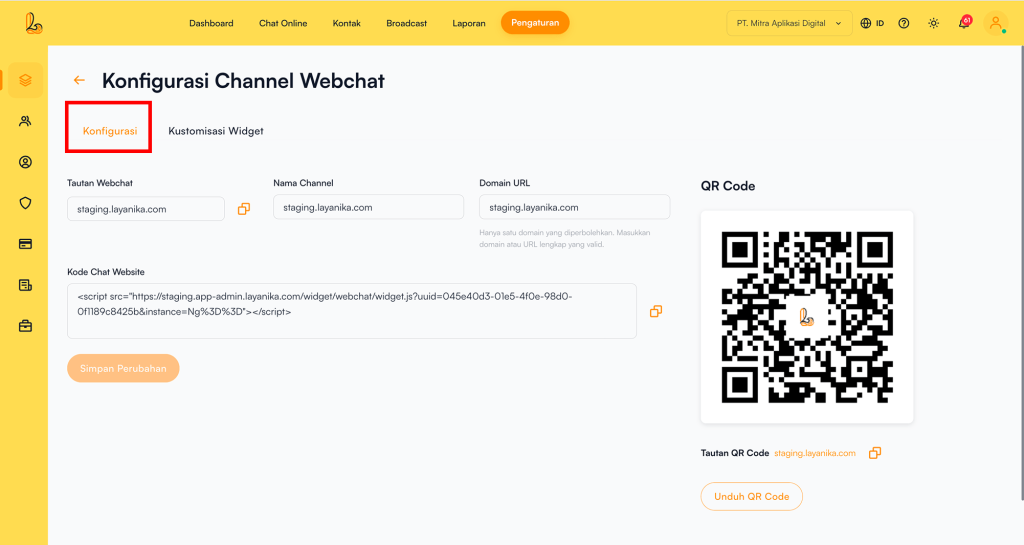
Channel Configuration #
Webchat Configuration page allows you to edit the channel name and provides a chat link and QR code to help customers start conversations with you.
Step 1:
Go to the Settingsmenu, then select Channel. Find your Webchat channel, then click Manage
Step 2:
On halaman Konfigurasi Webchat page you will see the following:
- Channel Name: The channel name can be edited and is used internally to identify the channel.
- Webchat Link: The chat link is a short URL that directs customers to start or continue a conversation with your Webchat account.
- Domain URL: The website connected to your widget.
- Qr Code: You can use the QR code to share the chat link with your contacts by clicking Download QR Code.
Delete Webchat Channel #
You can remove the Webchat channel from Layanika. Below is a guide on how to delete the channel:
Step 1:
Go to the Settings > Channel. Then Your Webchat channel, then click Manage
Step 2:
On the Webchat channel configuration page, click Delete Channel. The system will display a confirmation prompt asking whether you want to remove the Webchat channel. If you are sure, click Yes, Delete.